

This guide applies to Mac computers
About Sysdiagnose
A sysdiagnose in macOS collects diagnostic data for troubleshooting system issues. It gathers logs, crash reports, and system state from the Mac. You can generate a sysdiagnose in a few ways, depending on the user’s access level.How It Works
Sysdiagnose collects system information used to diagnose issues: performance data, logs, hardware information, and system state.- Generating a Sysdiagnose Using a Keyboard Shortcut
- Generating a Sysdiagnose Using the Command Line
- Generating a Sysdiagnose Using Activity Monitor
What Sysdiagnose Collects
When you run sysdiagnose, it gathers an extensive array of information, including:- System-wide performance profiles - Captures the state of running processes
- Filesystem activity logs - Reports on system calls and page faults related to filesystem usage
- Process information - Provides detailed data on running processes and memory usage
- Kernel memory usage - Includes data on kernel zones and loaded kernel extensions
- System and crash logs - Collects all relevant logs to help diagnose issues
- Hardware and software configuration - Similar to the System Information app, but more detailed
- Network and power management data - Details on current network status and power settings
Generating a Sysdiagnose Using a Keyboard Shortcut
1
Open Finder
Click the Finder icon in the Dock to ensure that Finder is in the foreground.
2
Use keyboard shortcut
All at once, press Command + Option + Shift + Control + Period (.) on the keyboard.
3
Wait for completion
After a few moments, a Finder window should appear with a tar.gz file shown.
4
Provide to support
If the sysdiagnose was requested by Iru Endpoint Support, please zip it and provide the entire bundle.
Generating a Sysdiagnose Using the Command Line
This method requires administrator privileges.1
Launch Terminal and run command
Launch Terminal.app and enter the following command:
2
Wait for file generation
Wait a few moments for a file ending in .tar.gz to appear on the logged-in user’s Desktop. If you logged into Terminal with a different user than is logged into the Mac, the file will be on the Terminal user’s Desktop.
3
Provide to support
If the sysdiagnose was requested by Iru Endpoint Support, please zip it and provide the entire bundle.
Generating a Sysdiagnose Using Activity Monitor
This method requires administrator privileges.1
Open Activity Monitor
Open the Activity Monitor app on your Mac.
2
Access system diagnostics
Click the ellipsis at the top of the Activity Monitor window.Select System Diagnostics…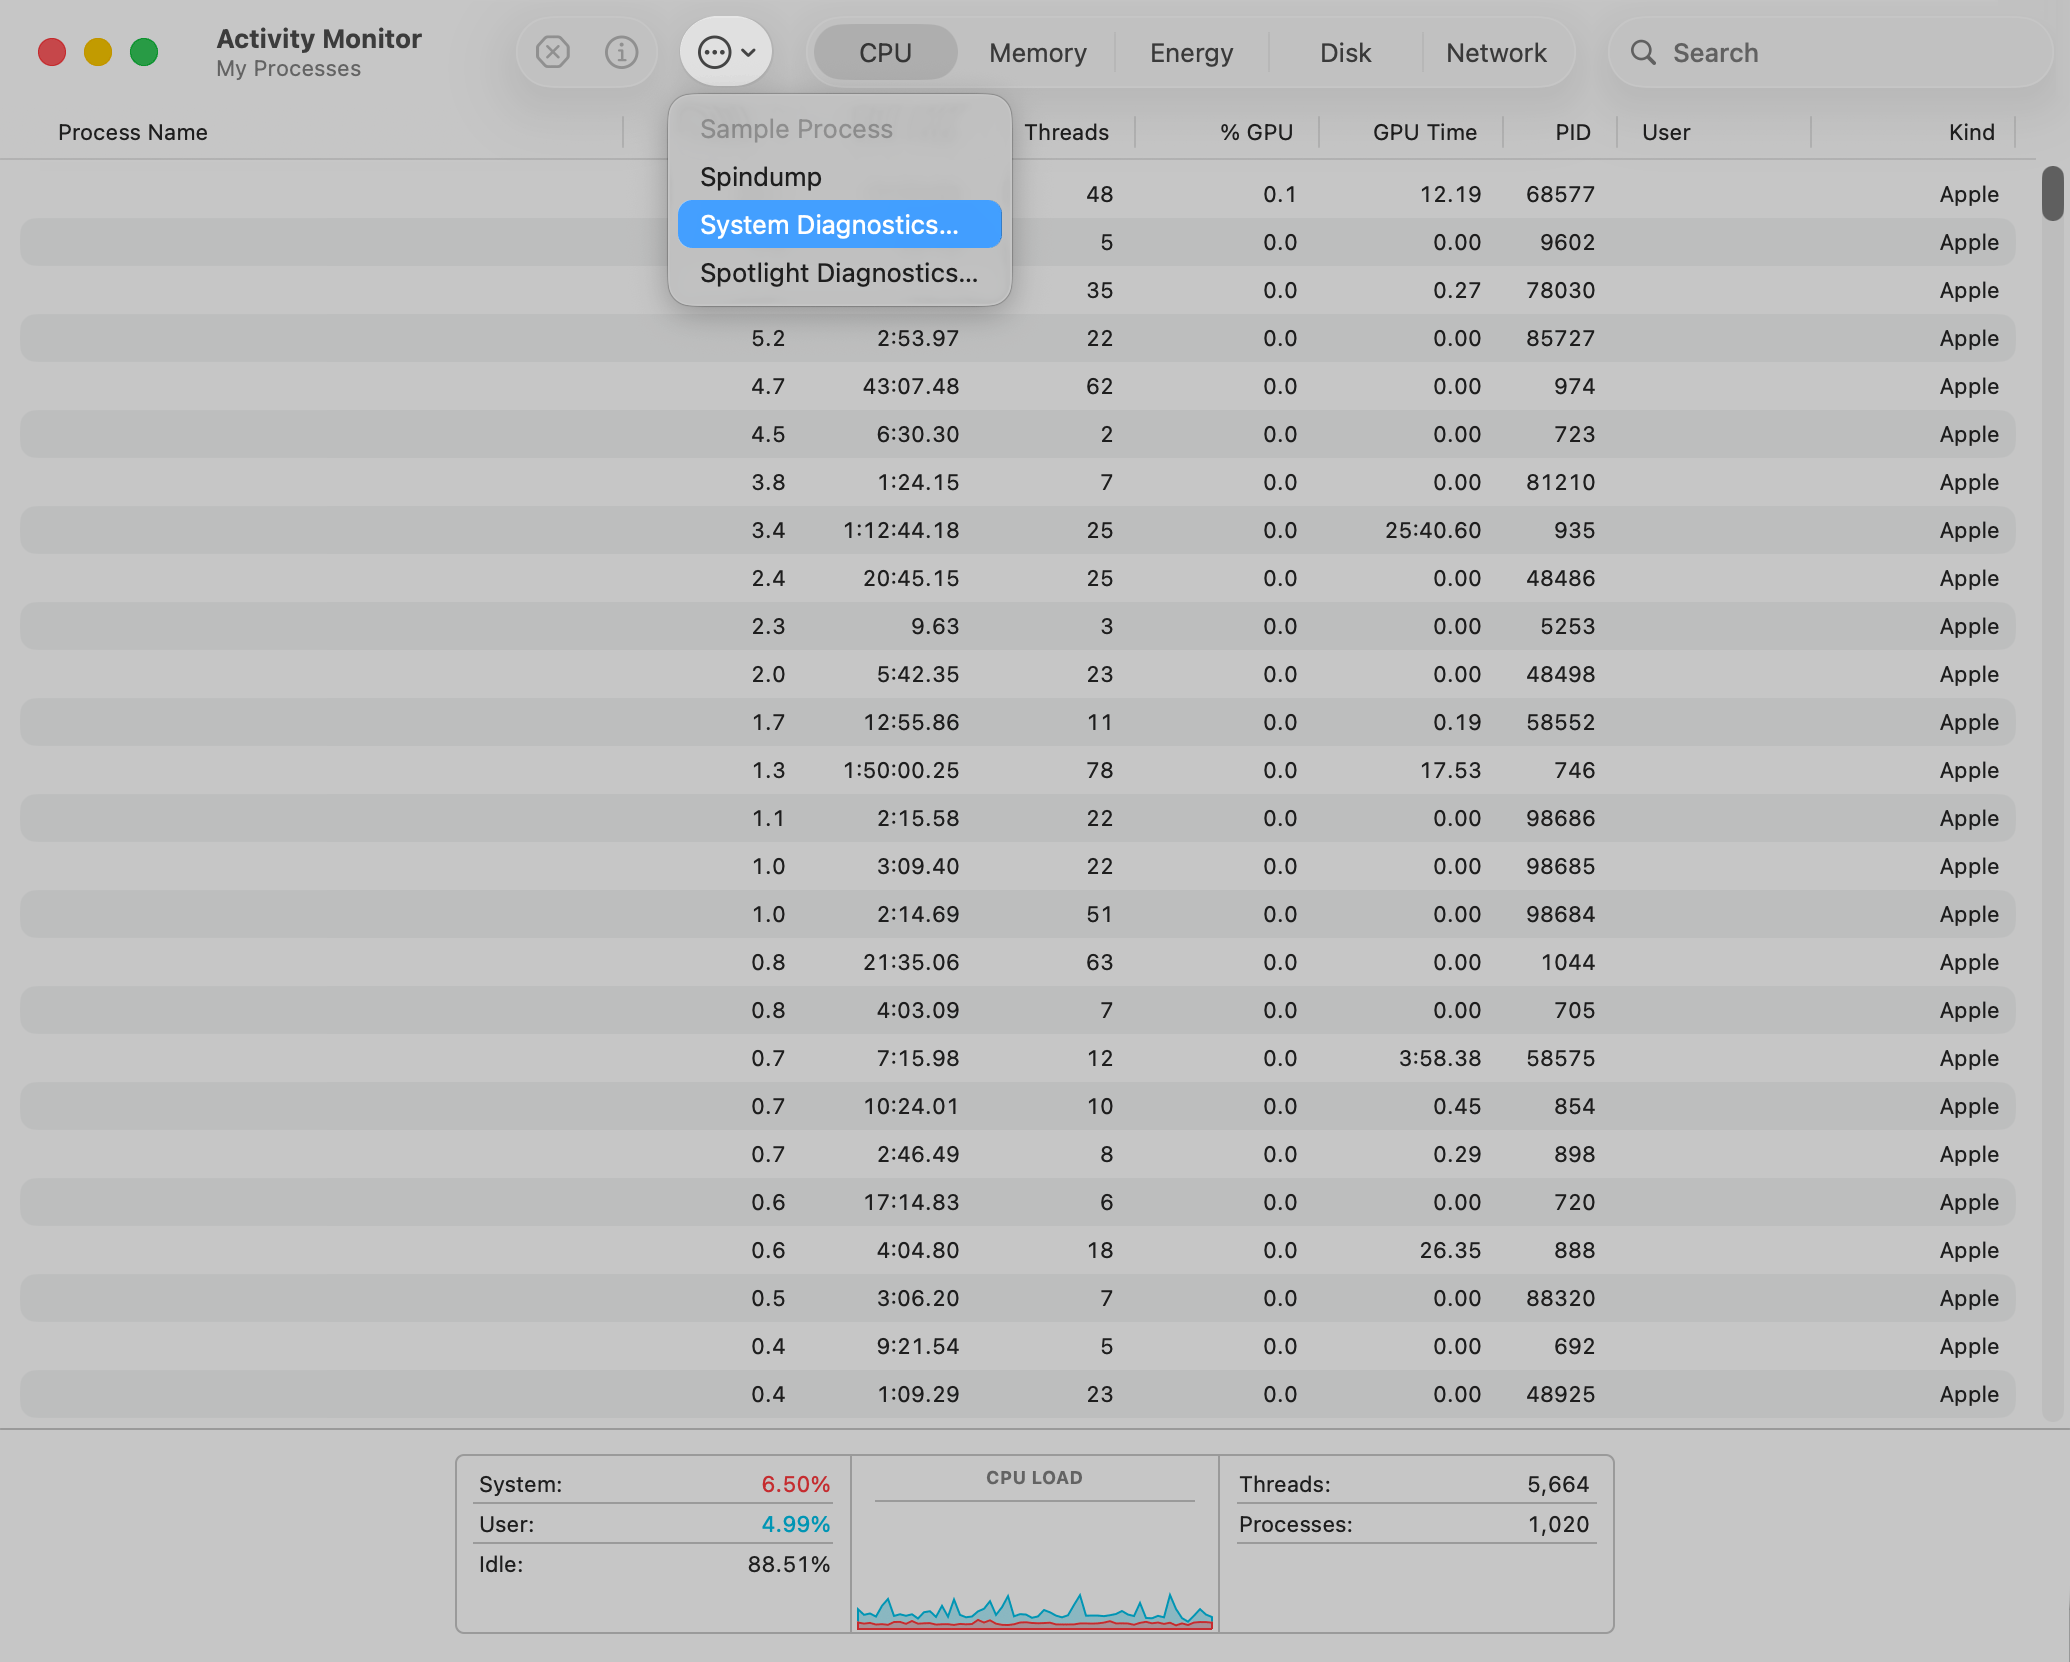
3
Accept privacy agreement
Read through and accept the privacy agreement.
4
Wait for completion
Wait for the progress bar to complete. Once done, a Finder window should appear with a tar.gz file shown.
5
Provide to support
If the sysdiagnose was requested by Iru Endpoint Support, please zip it and provide the entire bundle.